When we worked on SharpShooter Gauges several years ago, the slogan of this product was “You are able to create the gauge of any complexity”.
When we implemented Perfect Widgets based on SharpShooter Gauges, our goal was to provide the user with the ability to create the gauge of any complexity and integrate it into the webpage in two lines of code.
Initially we focused on the instruments having sliders, arrows, scales and other stuff that can be used in SCADA or other systems intended for monitoring and control.
However, after the product has been released, we found out that there are lots of other possibilities for implementing interactive widgets.
In this article I’ll show how to implement a Rating control using Perfect Widgets designer and add it to the webpage.

The most popular Rating control is a bar with five stars. The stars are filled based on the Rating value; it can be a number from 0 to 5.
Let’s implement the 5-star rating control for HTML5 using Perfect Widgets.
We will need a star that is a habitual constituent of a good rating bar.
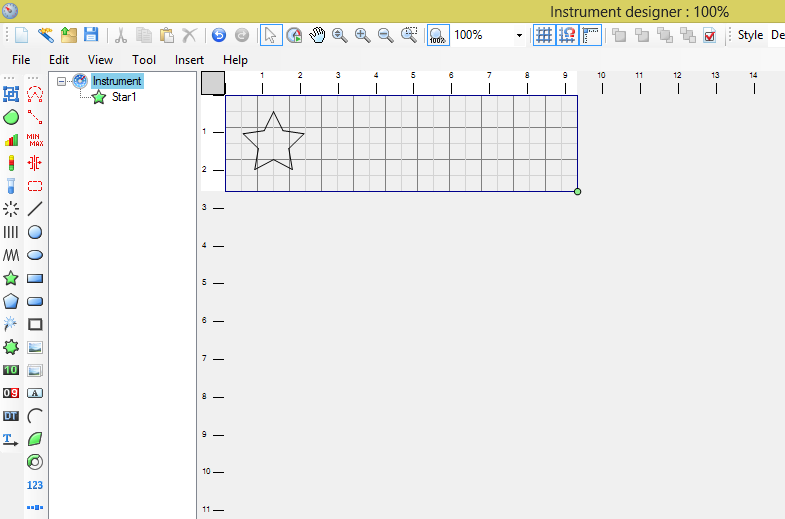
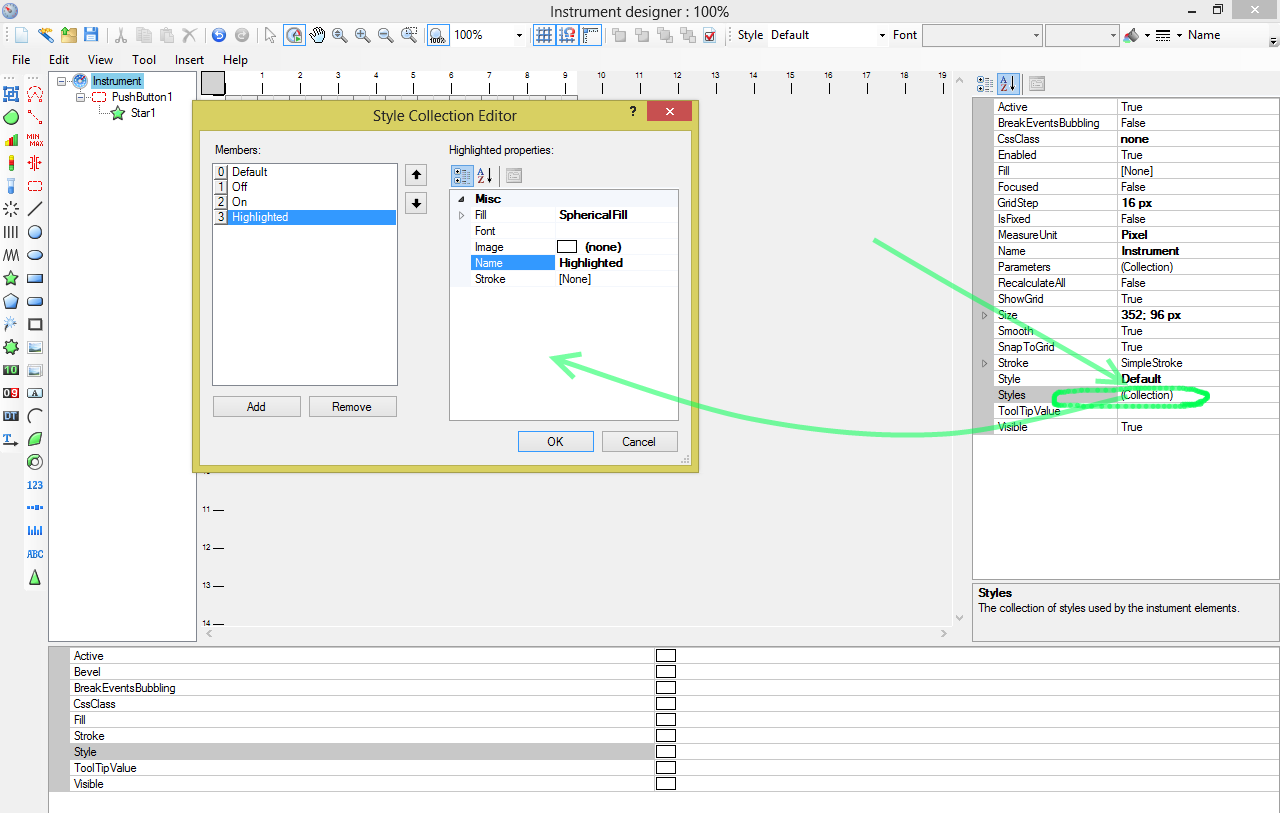
Let’s create several styles for the star element: On, Off, Highlighted.
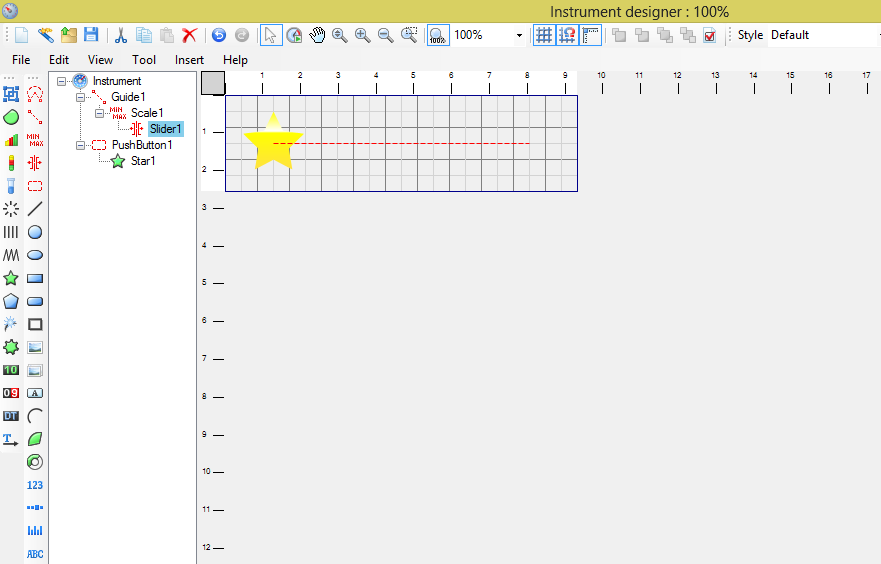
Add the following bundle: Guide->Scale->Slider.
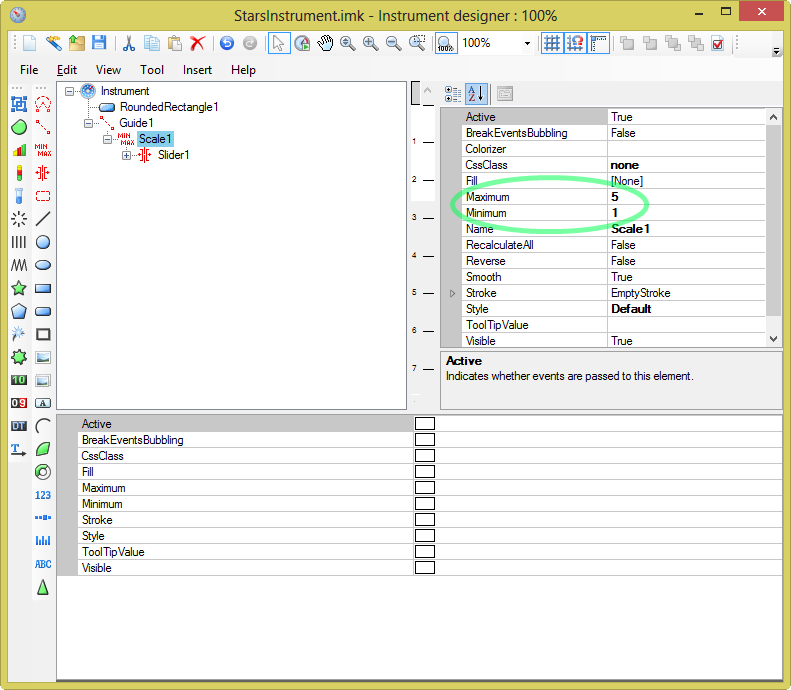
Set Minimum and Maximum values for the Scale. Minimum will be a low rate and Maximum will be a high rate.
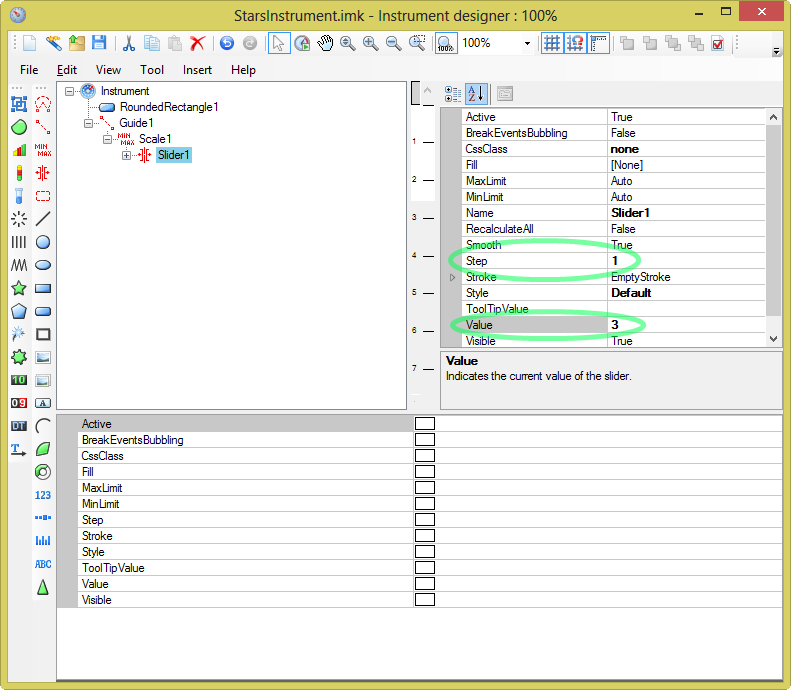
Set Slider.Step value to 1. It will make the slider to change on discrete basis.
Set Slider.Value to 3, so the default value of the slider (number of the first colored stars) will be 3.
Add background and the PushButton element.
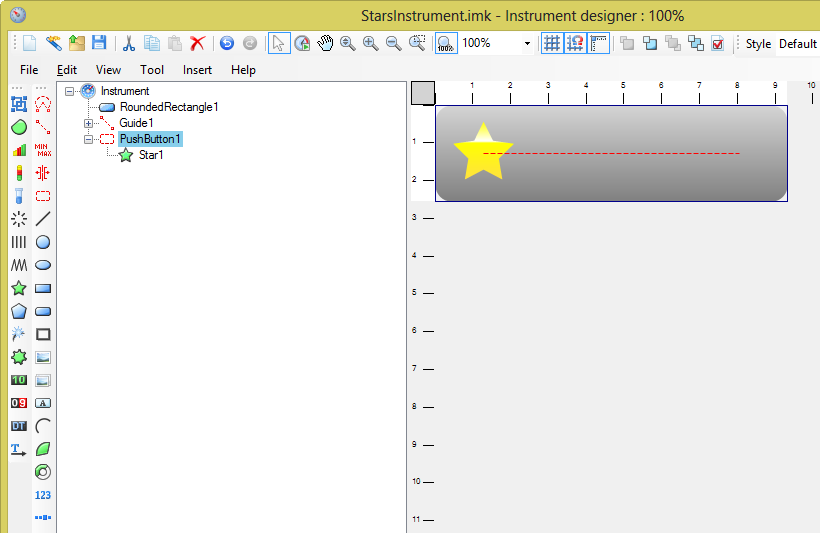
Drag and drop the star in the instrument tree and make it the child of the PushButton.
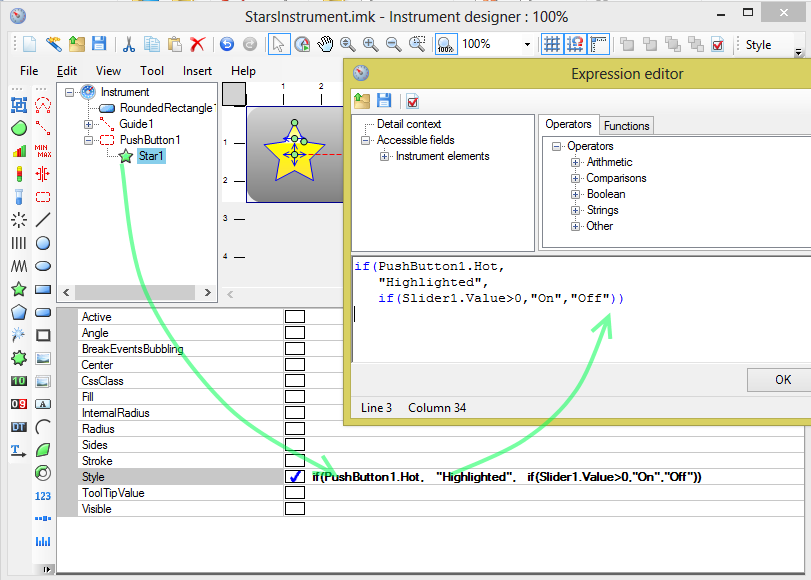
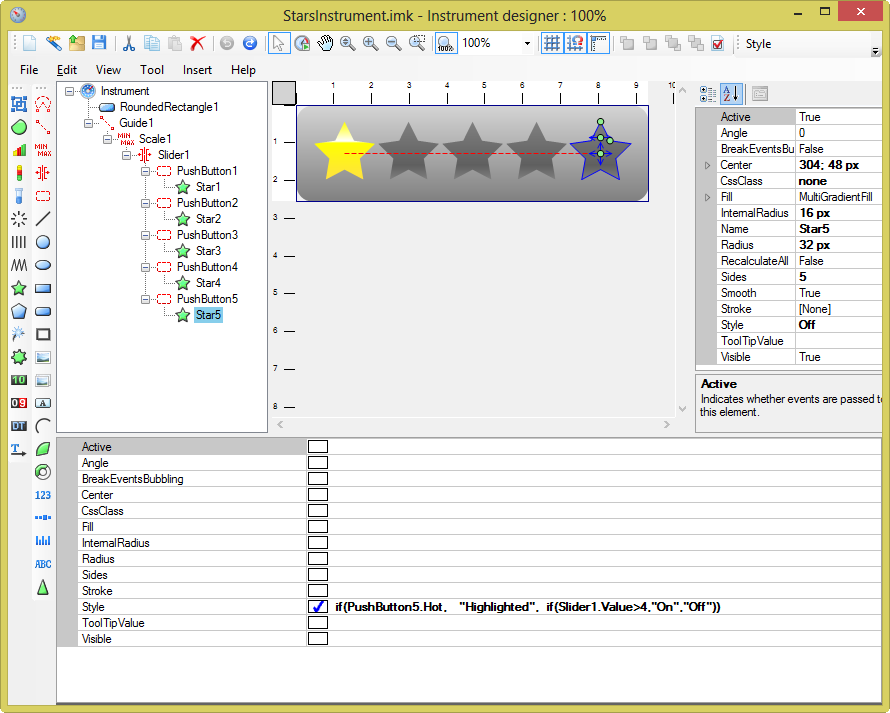
Set the following binding for the star’s Style property:
"Highlighted",
if(Slider1.Value>0,"On","Off"))
It means that when the mouse pointer hovers over the star, it changed style to Highlighted, otherwise “On” style is used if Slider1 value is greater than 0, otherwise “Off” style is applied.
To make slider value refresh it is necessary to place a PushButton as a child of the Slider in the instrument tree.
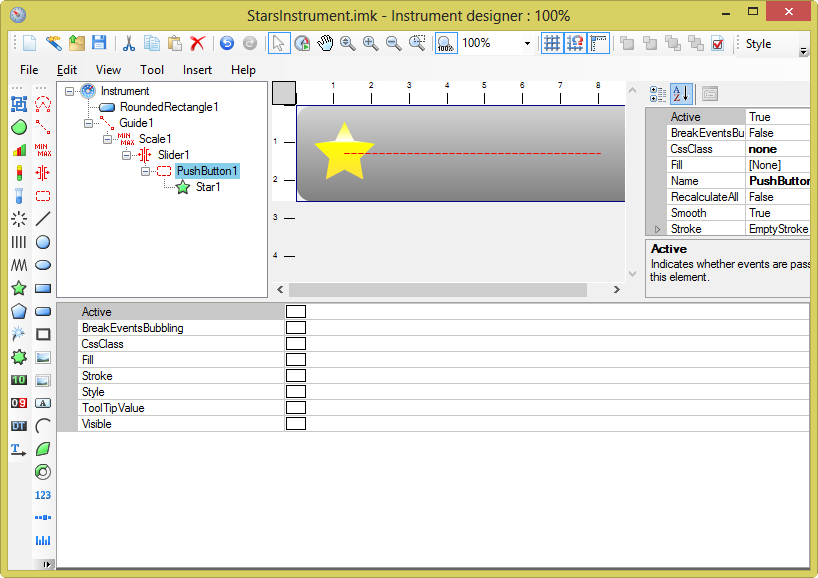
Now we can copy-paste the PushButton with the star. Don’t forget to change bindings*.
Star1.Style : if(PushButton1.Hot, “Highlighted”, if(Slider1.Value>0,”On”,”Off”))
Star2.Style : if(PushButton2.Hot, “Highlighted”, if(Slider1.Value>1,”On”,”Off”))
Star3.Style : if(PushButton3.Hot, “Highlighted”, if(Slider1.Value>2,”On”,”Off”))
Star4.Style : if(PushButton4.Hot, “Highlighted”, if(Slider1.Value>3,”On”,”Off”))
Star5.Style : if(PushButton5.Hot, “Highlighted”, if(Slider1.Value>4,”On”,”Off”))
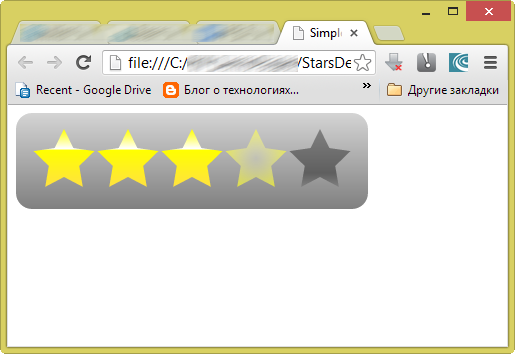
Our widget is ready. Now you need to export it to the JSON format and then embed the widget into the webpage as it described in the Perfect Widgets documentation.
Now you have a page with SVG-based Rating widget. Play with the widget!
*Please note that in the old versions of Perfect Widgets designer “>” operator was exported as “>=” so you need to search for “>=” in JSON and replace with “>” or rewrite the Style bindings taking this fact into account.