Master Report solution is indispensible when a number of your reports share some common part – most often, a static header or footer. Yet for such an ordinary task, amazingly little is said online about the exact steps we must go through to implement a Master Report in SharpShooter – so in this post let me regale you with the details!
Why Master Report.
Imagine there’s a bunch of clients receiving a bunch of weekly reports from us, but this time we want all of them to say “Happy New Year 2012″ on top. How cute, this should melt the hearts of all customers ![]()
Obviously, adding the greeting to each report is not feasible – instead we’d introduce a new template with the common header (the “Happy New Year” message) and a placeholder (container for the concrete reports).
As usual, you can browse source code, or download .zip archive of the final project, or (and!) join me on the fascinating journey of implementing the solution in this very article.
Solution (part 1 of 2). Report Designer.
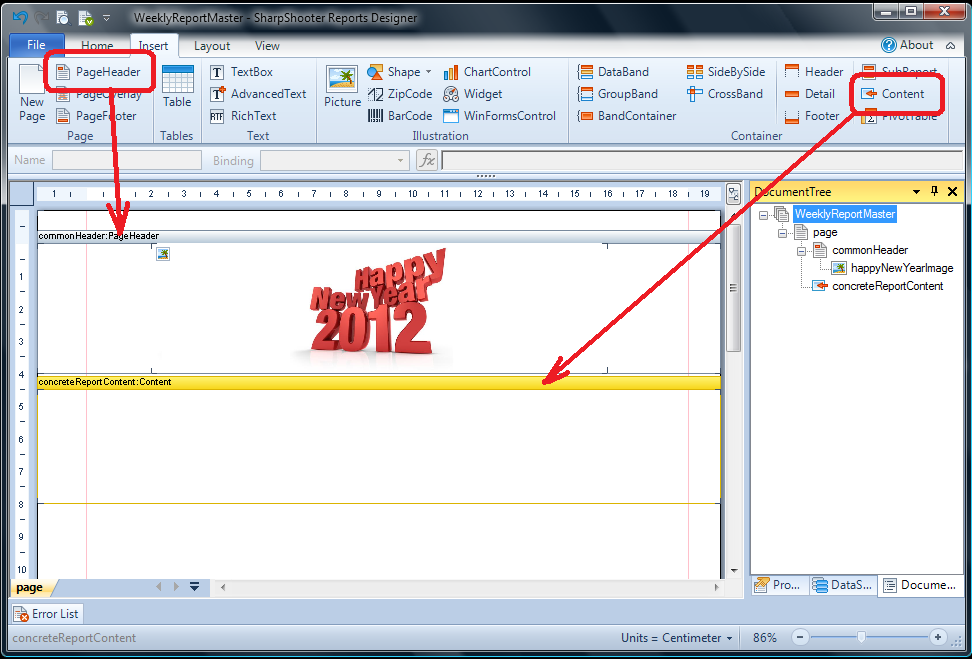
So said so done, we open up Report Designer, hit Ctrl+N to create a new blank report template, and drag-n-drop the following components:
- PageHeader with some nice image for the common header
- Content as a placeholder for the concrete reports
Well done! This template will be Master Report for our weekly reports, so let’s call it “WeeklyReportMaster” – on the screenshot below you can see the result.
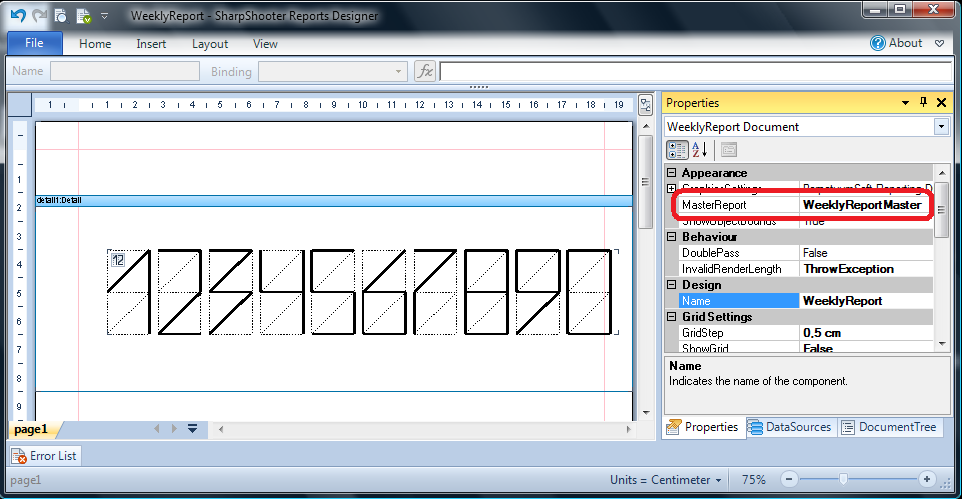
Above is the master report, and now let’s deal with the child one. Basically, the only thing where a “normal” template differs from a “child” one is its MasterReport property: if your report has a master, you specify the name there. In our case, we put WeeklyReportMaster because it’s the name of the master report.
In all other aspects a child template is absolutely the same as any other template, so just for sake of simplicity let’s create a very simple child report which has just zipcode component in it:
Solution (part 2 of 2). Visual Studio.
Now, having done both master and child templates, let’s turn our gaze to Visual Studio and deal with C# part.
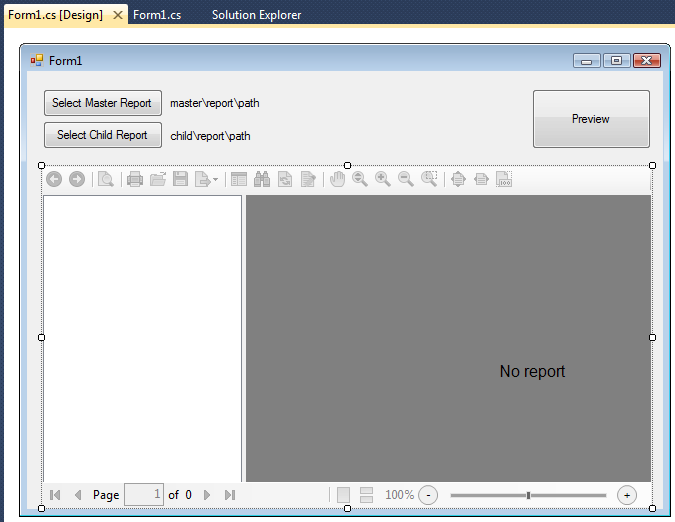
Here’s the application we’re about to create: two buttons for selecting master and child templates, two labels to display file paths for both, and ReportViewer to present the combined result when you click on the Preview button:
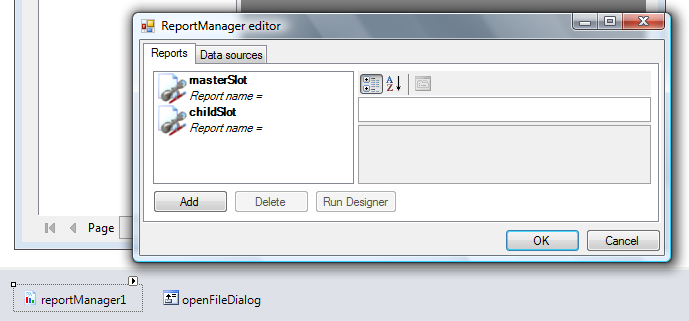
Other than that, we also have OpenFileDialog and ReportManager with two report slots:
Ready for the code run!
First off, let’s implement reports selection. The main gotcha here is that we need XSerializationManager to grab report template from an .rst file into the Document object:
   private void btnSelectMasterReport_Click(object sender, EventArgs e)
   {
      ApplyReportSlot(masterSlot, lblMasterReportPath);
   }

   private void btnSelectChildReport_Click(object sender, EventArgs e)
   {
      ApplyReportSlot(childSlot, lblChildReportPath);
   }

   private void ApplyReportSlot(ReportSlot reportSlot, Label reportPathLabel)
   {
      if (openFileDialog.ShowDialog() != DialogResult.OK)
         return;

      reportPathLabel.Text = openFileDialog.FileName;
      using (var file = openFileDialog.OpenFile()) {
         var document = (Document)XSerializationManager.Read(file);
         reportSlot.SaveReport(document);
      }
   }
Now the code for Preview button to specify the source for ReportViewer (just the child template, which in turn specifies the master template inside):
   private void PreviewReport(object sender, EventArgs e)
   {
      reportViewer1.Source = childSlot;
      reportViewer1.RefreshReport();
   }
Each time the above RefreshReport is called, a special event (somewhat confusingly named ResolveSubReport, perhaps a better name might be “ResolveMasterReport” because that’s exactly what it does) – so yeah, this event gets called and there we can specify the master report:
   public Form1()
   {
      InitializeComponent();
      reportManager1.ResolveSubReport += ApplyMasterReport;
   }

   private void ApplyMasterReport(object sender, ResolveSubReportEventArgs args)
   {
      if (args.TemplateName.EndsWith("Master")) {
         args.Template = masterSlot.LoadReport();
      }
   }
Our logic is simple: any template which name ends with “Master” is accepted as a master. It doesn’t have to be like that in your application, but it seems like a reasonable naming convention (and plays well with our example because, remember, our master template is called “WeeklyReportMaster”). Then, if necessary, we load one into ResolveSubReportEventArgs.Template , which later on gets processed internally by SharpShooter.
Final result.
Having done all the above, we can run the app, select the templates we created, and enjoy the final result where the “Happy New Year” header comes from the master template and the zip code comes from the child one:

Summary.
Master Report is a great solution when you need to share some common content across several reports.
Its implementation (as most of those with SharpShooter) comes in two steps: Report Designer step and Visual Studio step. In the first one we specify the master and child templates (where the latter would tell its master template name), and the second step basically boils down to properly implementing ResolveSubReport event on the ReportManager.
Feel free to browse source code of the solution, or download .zip archive – and, indeed, Happy New Year 2012! ![]()