Let’s assume that we do orders automatization in a small restaurant. It is an advanced high-tech restaurant where each table is supplied with a touch-based tablet using which a customer can make an order.
We won’t pay too much attention to the application for making orders. Lets just assume that a user press a button from time to time to order one more glass of Gloria Ferrer Carneros Pinot Noir 2007 or a serve of the Stuffed London Broil & New Potatoes (please don’t follow the links if you have not had lunch yet ![]() .
.
I will give you a handle here to think of the user interface for orders application and we will not come back to it anymore.
As soon as a customer has chosen what he wants to eat or drink , the order is automatically sent to a server and is displayed in the list on the kitchen and at the bar counter for the waiters to see the orders.
Moreover, the restaurant manager can trace orders for each table, status of an order, how long a dish is being cooked, etc. This interface for the manager we are going to implement in our sample.
Step 1. Start Drawing
This is the simplest step that does not require any programming knowledge, that is why I would like to begin here.
Instead of embedding Diagramming component into our application and open the editor programmatically, let’s use the “backdoor” and use the Grapholite. This is an online services provided by Perpetuum Software created on the base of SharpShooter Diagrams, where we break in new solutions and at the same time give users an opportunity to draw any diagrams supported by the product.
In the opened designer we press the “Create Blank” and select the “Floor Plan” diagram type.
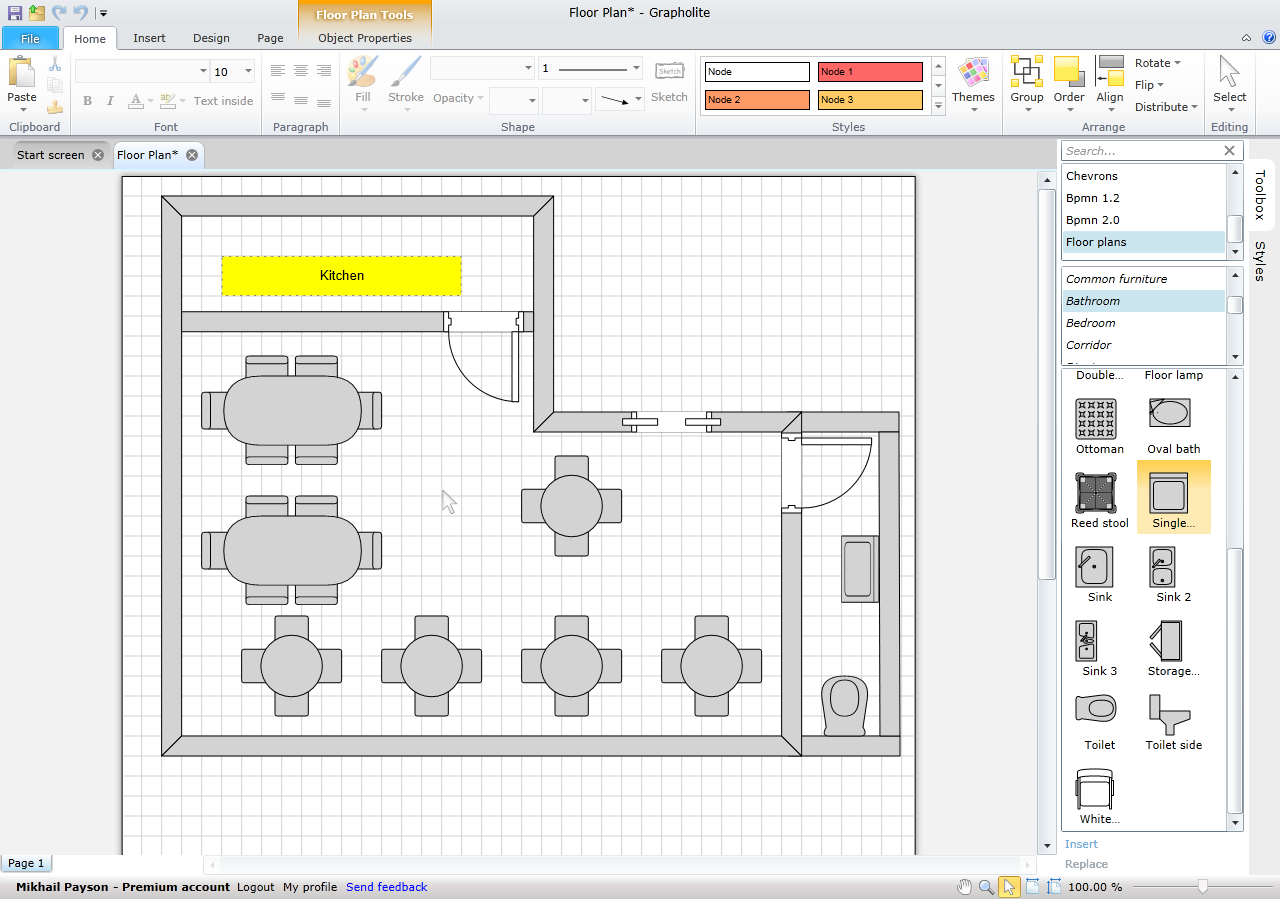
In several minutes of work with the editor I got something like what you see on the picture below:
I must confess that I am a terrible restaurants planner, so of course the fire code or any other important in real-life norms are not followed here. But I hope this does not bother you.
Now, I will take advantage of my premium subscription for Grapholite and save a local copy of my piece of work in the GRL format – a standard format in SharpShooter Diagrams.
If you don’t want to pay $5.00 per month for a premium account for Grapholite (although I think this price is nothing for such a service), you can do the same using the off-line component, as it is shown in the Serialization section of the Samples Center.
So, we have the RestaurantPlan.grl file that contains the plan. Let’s bring it to life!
Step 2. Integrating a diagram into the application
To integrate the component, let’s create a Silverlight project and name it as, for example, RestaurantManagersConsole. Now we add references to the SharpShooter Diagrams libraries. You can find more information on how to do this in our knowledge base.
To display diagrams we use XAML markup and the code that you can see in the Diagram Viewer section of the Samples Center.
The first thing to do now is to add the RestaurantPlan.grl file to the application resources and set the Build Action property to “Resource”. (Voice from the future: remember this step, you will need to do it many times more).
In the MainPage.xaml, we add the
- xmlns:diagrams=“http://schemas.aphalina.com/diagrams”
To the list of namespaces, and the following code inside an empty Grid:
This code defines a control that will display our Floor Plan. We will update the XAML during our work, so don’t be surprised to see a little bit different one in the sample application.
Following the documentation, we write the following code in the MainPage.xaml.xs:
- public MainPage()
- {
- InitializeComponent();
- }
- private void restaurantPlanDiagram_Initialization(object Sender, System.EventArgs e)
- {
- restaurantPlanDiagram.RegisterAssembly(typeof(FloorPlanDocumentType).Assembly);
- restaurantPlanDiagram.RegisterAssembly(typeof(FloorPlanToolboxBuilderBase).Assembly);
- using (var stream = ResourceHelper.LoadStream(Assembly.GetExecutingAssembly(),
- “RestaurantPlan.grl”))
- restaurantPlanDiagram.OpenDiagram(stream, “Restaurant Plan”, true);
- }
Please pay attention to the following two lines:
- restaurantPlanDiagram.RegisterAssembly(typeof(FloorPlanDocumentType).Assembly);
- restaurantPlanDiagram.RegisterAssembly(typeof(FloorPlanToolboxBuilderBase).Assembly);
They allow registering components of the Floor Plan diagram type to enable further work with them. Without these two lines you will get the System.Collections.Generic.KeyNotFoundException exception. And it will be kind difficult to find its reasons on your own.
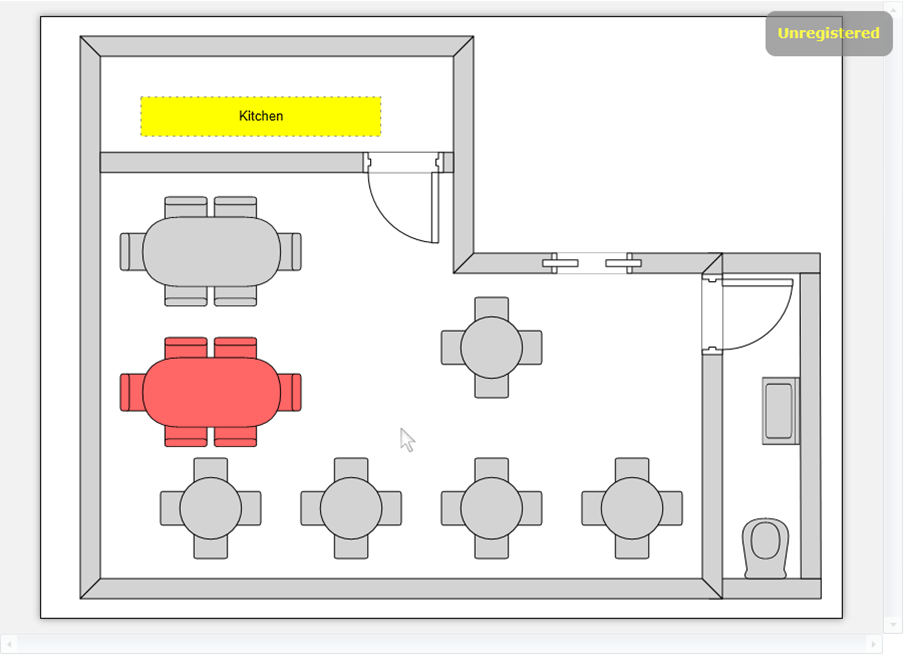
Launch the application and see the first results:
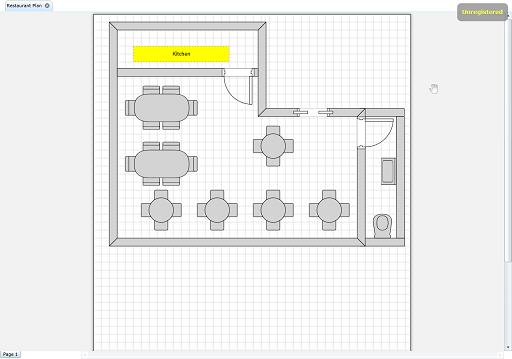
Restaurant Plan: First version
Don’t pay attention to the Unregistered notice in the top-right corner. This can be easily cured by the purchase of the license for the component
Step 3. Preening feathers
Let’s look at our diagram once again. I don’t like several issues here. First of all, we don’t need the grid. Second – we need to get rid of the tab on the top and the third thing – page name (Page1) seems unnecessary here.
Let’s try to fix this.
Although the second task was easily solved by setting the ShowDocumentTabs property for DiagramComponent to, the first task required some efforts, and third one was solved due to some magic power.
By looking through the results of the IntelliSense (unfortunately, class reference for SharpShoter Diagrams is not available yet), we need to find the Document property for the DiagramComponent object that describes a document loaded into the viewer. The same way, looking through the Document, we find the Pages property that represents (surprisingly!!!) a special collection of the objects of the Page type.
After all this, hoping the miracle will happen, we go to the first page of the collection and find there the long-awaited ShowGrid property and set it to false.
As a result we get the following code:
- restaurantPlanDiagram.Document.Pages[0].ShowGrid = false;
Do you like it? To say the truth, I don’t! So, let’s come back to Grapholite, load a diagram from a local disc and remove the grid by unchecking the corresponding option on the Page tab. Since we are here, let’s update the sizes to make the empty space in the bottom. And the 800×600 values instead of fractional pixel values set for the A4 format make the diagram much prettier.

Grapholite: Diagram Settings
Save the GRL document locally, add to the project again (don’t forget to set the Build Action to Resource) and rebuild the application.
As for the page name in the bottom of the page, I found the way to remove them absolutely accidentally when I was looking through the source code of the Look & Feel Setup sample in the Samples Center. I won’t go into too much details here and just provide a piece of code which is added to the end of the restaurantPlanDiagram_Initialization method and does the job:
- restaurantPlanDiagram.Model.DocumentModel.SupportsMultiplePages = false;
I think that sharp minded reader can understand what objects in this chain of calls are responsible for.
To make it perfect, we set the sizes for the DiagramComponent in XAML:
- <diagrams:DiagramComponent
- x:Name=“restaurantPlanDiagram”
- ShowDocumentTabs=“False”
- Initialized=“restaurantPlanDiagram_Initialization”
- Width=“900″
- Height=“650″
- />
Let’s launch the application and see what we get now. I like new results much more:
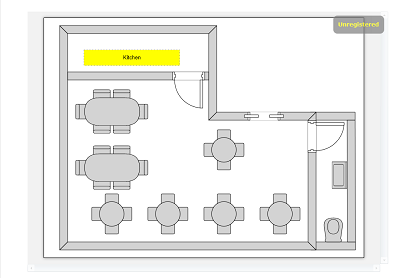
Restaurant Plan: Second version
Step 4. Adding interactivity
So, the diagram is integrated into our application, but it’s only the beginning. Now we need to add some interactivity there.
First of all, let’s understand what elements a user shall interact with. We obviously don’t need walls, doors, and plumbing. Actually, we need just the tables.
For interactivity implementation let’s have a look at the Tools samples in the Samples Center.
So, first we need a tool for the tables marking.
We add the TableSelectionTool class inherited from the Aphalina.Drawing.ManipulationTool to the project. Following the sample, we implement a constructor there and overload the MouseDown method there:
- public override void MouseDown(MouseData data)
- {
- base.MouseDown(data);
- Element element = HitTest(data.Position) as Element;
- if (element == null)
- {
- return;
- }
- }
This way we define an element by which there was a mouse click (and we will not do anything if a user clicks outside the element).
Then, we set this element as the current one for the diagram by adding one more line of code to the restaurantPlanDiagram_Initialization method:
- restaurantPlanDiagram.Model.DocumentModel.Tool =
- new TableSelectionTool(restaurantPlanDiagram.Model.DocumentModel.Container);
And our task now is to learn how to determine the current active element and color it. To do this we will have a look at the Change from Code sample in the Samples Center.
We carefully investigate methods for the element object which are suggested by IntelliSense and find the StyleName method there. Honestly, for now we don’t have a clue how to use it (let’s assume that I am a new user and don’t know what this property is about). Let’s pursue an investigation to understand how we can influence the StyleName.
First of all, let’s see what value the property has by default. To do this we add the following line of code to the MouseDown method of the newly created TableSelectionTool tool:
- System.Windows.MessageBox.Show(element.StyleName);
By clicking an element we get the following message:
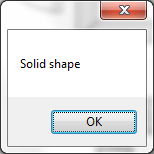
StyleName of the table Element
So, we know that the current style of an object is the “Solid shape”. And now we need to define how to set a different style for an object.
But what is the right way to set the correct constant for the style name? Let’s have a closer look at the ribbon in Grapholite. On the Home tab we see the Styles section and names of styles there. Seems we are on the right way.

Grapholite: Styles
Let’s try to remove the MessageBox call and add the following code instead:
- element.StyleName = “Node 1″;
Launch the application and click the table image. And we get what we expected:
Well, now it is possible to select not only tables, but also other objects, but it is not so important on this step.
Step 5. Remembering the selected element
Currently, all the “interactivity” of our application is that a mouse click any element makes the element selected (red).
And now, when we know how to catch the clicks an element and mark it, we need to learn how to select only one element on a diagram.
Let’s try to follow, at least at minimum level, the MVVM design pattern, but we will not complicate the code too much which, in the end, is just demonstration of SharpShooter Diagrams work.
So, the first thing we do is the creation of the RestaurantPlanViewModel class that will be responsible for the business logic of our small application and set it as DataContext in the MainPage.xaml.
To do this we add a local namespace to the XAML header:
- xmlns:local=“clr-namespace:RestaurantManagersConsole”
And then we add the following code to XAML:
- <UserControl.DataContext>
- <local:RestaurantPlanViewModel/>
- </UserControl.DataContext>
In the RestaurantPlanViewModel class, we implement the following properties and methods:
- public class RestaurantPlanViewModel : INotifyPropertyChanged
- {
- //property changed event
- public event PropertyChangedEventHandler PropertyChanged;
- //Style names for selected and unselected elements
- private const string UNSELECTED_STYLE_NAME = “Solid shape”;
- private const string SELECTED_STYLE_NAME = “Node 1″;
- //Current selected element
- private Element _selectedElement;
- //Change selected element
- public void ChangeSelection(Element element)
- {
- if (_selectedElement != null)
- {
- _selectedElement.StyleName = UNSELECTED_STYLE_NAME;
- }
- _selectedElement = element;
- _selectedElement.StyleName = SELECTED_STYLE_NAME;
- }
- }
I intentionally carry over the changes of the selected element in a separate function because I plan to add some additional functionality there later.
To enable XAML to have the latest information about the ViewModel properties, we implement the INotifyPropertyChanged interface by adding the PropertyChanged class event.
Besides, we will need to get access to the ViewModel from the tool. To do this I add the following field to the TableSelectionTool class:
- private RestaurantPlanViewModel _viewModel;
Then we modify the constructor of the class to pass there and save a copy of the ViewModel:
- public TableSelectionTool(IContainer container, RestaurantPlanViewModel viewModel )
- : base(container)
- {
- _viewModel = viewModel;
- }
We will also need to make some changes to the MainPage.xaml.cs by passing the current DataContext (that is the right View Model) to the constructor by writing the following code:
- restaurantPlanDiagram.Model.DocumentModel.Tool =
- new TableSelectionTool(
- restaurantPlanDiagram.Model.DocumentModel.Container,
- this.DataContext as RestaurantPlanViewModel);
instead of:
- restaurantPlanDiagram.Model.DocumentModel.Tool =
- new TableSelectionTool(
- restaurantPlanDiagram.Model.DocumentModel.Container);
Considering these changes, the MouseDown method of the TableSelectionTool class will be like follows:
- public override void MouseDown(MouseData data)
- {
- base.MouseDown(data);
- Element element = HitTest(data.Position) as Element;
- if (element == null)
- return;
- if (_viewModel == null)
- return;
- _viewModel.ChangeSelection(element);
- }
Note that even if the DataContext parameter will not be casted to the RestaurantPlanViewModel type when passing to a parameter, there is nothing wrong in this since we check the _viewModel for the null when referring to its property directly in the tool itself. Mouse click will not do its job in this case. By the way, if you read this sentence, write at [email protected] and get the 15% discount for SharpShooter Diagrams
Here we finish with objects selection. Now we just need to show information related to the currently selected table.
Step 6. Displaying information about the selected table.
Now we need to learn somehow how to connect a selected table with the information on its status (vacant/occupied/reserved, etc). But first of all let’s learn to define what table we click.
Here we face a problem that may destroy all our efforts. From the first sight the problem does not seems unsolvable. All objects have the Name property which we could easily use. We can set the Name property for any object from the code, but unfortunately we don’t have the ability to set a name for a specific object created in Grapholite. To solve the problem we could create a custom diagrams designer based on SharpShooter Diagrams, and add the fields for setting names manually on the Toolbox, but this goes beyond the scope of this article. We will add the feature to identify specific objects in one of the next Grapholite versions, but for now let’s use a workaround.
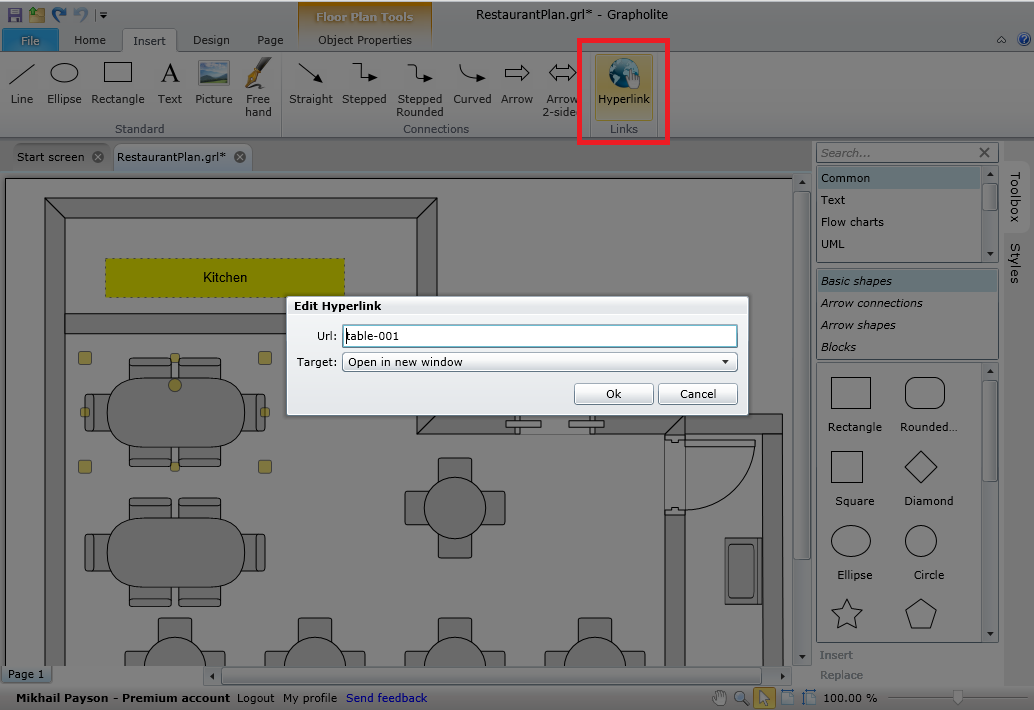
If we have a closer look at the object of the Element class, one can note that it has the Hyperlink property. Actually it is needed to open some URL when an element is being selected, but we will try to use it for purposes other than that intended. Open Grapholite once again and load the RestaurantPlan.grl there. Select every table in turn, press the Hyperlink button, and set the URL the following way: “table-001″, “table-002″ etc.
After doing this with every table we get the values from “table-001″ to “table-007″.
Save a diagram locally and add it to the project again by setting the Build Action to the Resource.
Now it’s time to work with the data.
First of all, let’s create a data model that contains information about a table. For a sample, we will show just minimum information: status, reservation time and name of a person who reserved it. I am pretty sure that you can implement much more complicated data model if needed.
So, we create the TableInfo class with the following content:
- public class TableInfo
- {
- //Status names
- public const string NO_RESERVATION = “Vacant”;
- public const string RESERVED = “Reserved”;
- public const string OCCUPIED = “Occupied”;
- private string _reservationStatus = NO_RESERVATION;
- public string ReservationStatus
- {
- get { return _reservationStatus; }
- }
- private DateTime _reservationTime;
- public DateTime ReservationTime
- {
- get { return _reservationTime; }
- }
- public string ReservationTimeString
- {
- get
- {
- if (_reservationTime.Ticks == 0)
- return “”;
- return _reservationTime.ToShortDateString()
- +“ at ”
- +_reservationTime.ToShortTimeString();
- }
- }
- public string _reservedBy;
- public string ReservedBy
- {
- get { return _reservedBy; }
- }
- //Default constructor
- public TableInfo() : this(NO_RESERVATION, new DateTime(0), null){}
- //Parameterized constructor
- public TableInfo(string reservationStatus,
- DateTime reservationTime,
- string reservedBy )
- {
- _reservationStatus = reservationStatus;
- _reservationTime = reservationTime;
- _reservedBy = reservedBy;
- }
- }
The class consists of 3 properties:
- ReservationStatus – string property that defines table status (reserved, vacant, occupied).
- ReservationTime – the property that defines table reservation time.
- ReservedBy – the property that stores name of a person who reserved a table.
Besides, the class contains the ReservationTimeString property that allows getting “pretty” string presentation for the DateTime. Although the method disturbs the harmony of the data model by adding there the functionality more peculiar to the view, but it will simplify our code and make it clean, so I intentionally made this architectural shortcoming.
With the project development we can amplify our data model with table reservation methods for a particular time, for a moment when a table becomes vacant, occupied, etc, but we don’t have such necessity in this sample.
Now, let’s work with the data.
In the RestaurantPlanViewModel class, we add the Dictionary, that includes elements with statuses for every table and initialize it with text data:
- private Dictionary<string, TableInfo> TableInfoData =
- new Dictionary<string, TableInfo>()
- {
- {“table-001″, new TableInfo()},
- {“table-002″, new TableInfo(TableInfo.RESERVED,
- new System.DateTime(2012, 2, 20, 18, 0, 0), “Steven Spielberg”)},
- {“table-003″, new TableInfo(TableInfo.OCCUPIED,
- new System.DateTime(), “Peter Jackson”)},
- {“table-004″, new TableInfo(TableInfo.RESERVED,
- new System.DateTime(2012, 2, 20, 19, 0, 0), “James Cameron”)},
- {“table-005″, new TableInfo()},
- {“table-006″, new TableInfo(TableInfo.OCCUPIED,
- new System.DateTime(), “Martin Scorsese”)},
- {“table-007″, new TableInfo(TableInfo.RESERVED,
- new System.DateTime(2012, 2, 20, 18, 30, 0), “Quentin Tarantino”)}
- };
The key of the string type will include ID of a table and the value – information about it.
Obviously, we considerably simplify the things here. In real life, we would get data from some data source and initially the data were entered into some ordering application, etc.
Besides, we need to track information for a current table and pass it to XAML. To do this we add the SelectedTable public property into RestaurantPlanViewModel:
- public TableInfo SelectedTable
- {
- get
- {
- //Nothing selected or hyperlink of selected element is not set
- if (_selectedElement == null || _selectedElement.Hyperlink == null)
- return null;
- return TableInfoData[_selectedElement.Hyperlink.Url];
- }
- }
And the last thing we need to do here is to add the PropertyChanged event call to the ChangeSelection method of the RestaurantPlanViewModel class:
- public void ChangeSelection(Element element)
- {
- …
- _selectedElement.StyleName = SELECTED_STYLE_NAME;
- PropertyChanged(this, new PropertyChangedEventArgs(“SelectedTable”));
- }
Now we need just to add the display of the selected table to XAML and our small application will be ready.
We won’t spend time here on designing UI and just display information about the selected table on the right side of a diagram. To do this, let’s modify MainPage.xaml the following way:
- <StackPanel Orientation=“Horizontal”>
- <diagrams:DiagramComponent x:Name=“restaurantPlanDiagram”
- ShowDocumentTabs=“False”
- Initialized=“restaurantPlanDiagram_Initialization”
- Width=“900″
- Height=“650″
- />
- <StackPanel Height=“650″ Margin=“10″>
- <TextBlock
- Text=“{Binding Path=SelectedTable.ReservationStatus}”
- FontWeight=“Bold” />
- <TextBlock Text=“{Binding Path=SelectedTable.ReservedBy}”/>
- <TextBlock Text=“{Binding Path=SelectedTable.ReservedTimeString}”/>
- </StackPanel>
- </StackPanel>
All these changes here mean the following: we added the StackPanel element which includes 3 text fields for displaying the parameters of the selected table and connected them with the corresponding property SelectedTable at RestaurantPlanViewModel.
Among other changes we can note are that we replaced the Grid in which the diagram was located on StackPanel (to eliminate work with ColumnDefinition). Let me repeat again – the form has nothing to do with good user interface design, but this is ok because UI design is not the main idea of this article.
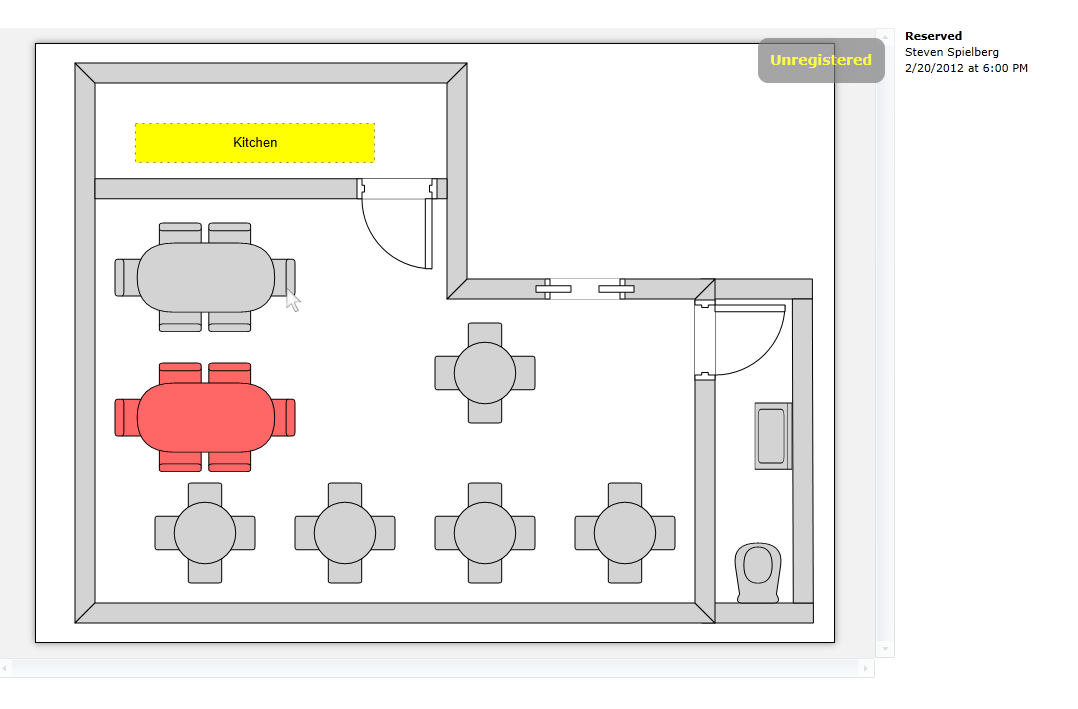
So, launch the application, click one of tables and finally on the right side of the plan we see the texts describing current status of a table. Voila!
Ideally, our next tasks should be to connect the application with a real database, create a pretty UI, etc. But our main task for now is done – we created a working application based on the Floor Plan diagram.
Retrospective Review
So, now let’s remember step-by-step what we did to implement an interactive Floor Plan for our Silverlight application. Despite the fact that the description of the sample occupies 15 pages, the main steps can be easily traced:
- We created the Floor Plan in Grapholite editor, set its appearance and wrote a hyperlink for every table as “table-00x”. Then, we saved the file locally and added it to the project as a resource.
- We added the component for diagrams viewing in the application and configured the viewer appearance.
- We created a custom tool that captured clicks on the component and passed information about it to ViewModel.
- We created ViewModel, that changed style of an element when it is clicked.
- We created a set of text data and bound diagram objects with the data through the corresponding Dictionary, whose key was the same as a hyperlink of a table.
- We displayed information about the current table in XAML by connecting it with ViewModel through the SelectedTable property.
As you can see, adding Floor Plans to an app using SharpShooter Diagrams – is a simple process that will help you avoid implementation of heavy editors and visualization system.
You can download the source code of the project here.
